

Table of Contents
- Step 1: Identify the Damage and Fabric Before You Repair Athletic Apparel
- What You'll Need: Tools and Materials for DIY Repair
- How to Repair a Snag in Athletic Clothing
- How to Repair a Hole in Leggings
- How to Fix a Seam in Activewear
- Repairing High-Stress Areas and Reattaching Lettering
- Care Instructions After Repair and When to Replace Gear
- Keep Your Gear in the Game with Burrow Athletic
- Frequently Asked Questions
Last Updated: November 4, 2026
Step 1: Identify the Damage and Fabric Before You Repair Athletic Apparel
Learning how to repair damaged athletic apparel starts with one honest look at the garment. A snag, a hole, a split seam and a worn patch all need different fixes. Grab the piece, turn it inside out, and check the fabric tag before you thread a needle. This guide walks you through each repair so your favorite gear stays in rotation longer.
Performance fabric is any textile built to move sweat, stretch and hold its shape during training. Most activewear blends polyester, spandex and mesh. Those fibers behave nothing like cotton, and that changes how you mend them. The single biggest mistake home repairers make is treating a stretch blend like a cotton tee: a standard straight stitch on spandex will snap the first time you squat, and too much iron heat will melt the elastane and leave a permanent shiny scar.
Match the Repair Method to the Fabric Type
Not every patch works on every material. A method that saves a cotton tee can ruin a stretch legging. The table below pairs each common athletic fabric with a general repair approach that preserves its stretch, breathability or finish, plus the failure mode to avoid.
| Fabric | Best Repair Method | Why It Works | Avoid |
|---|---|---|---|
| Polyester jersey | Hand-sew with polyester thread or a low-heat iron-on patch | Polyester thread matches the fiber's give and won't shrink | High iron heat, which can glaze the surface |
| Spandex or elastane | Stretch stitch with elastic thread, or a stretch patch | Elastic thread moves with the fabric instead of fighting it | Standard straight stitch, which pops under tension |
| Mesh | Fine ball-point needle and light polyester thread | A ball-point needle pushes between fibers rather than cutting them | Heavy patches that block airflow and add bulk |
| Fleece | Whip stitch or flexible fabric adhesive | Loose stitches and flexible glue follow the nap without stiffening | Tight, rigid seams that crush the pile |
| Waterproof or coated fabric | Heat-activated repair tape or a seam-sealed patch | Tape bonds to the coating without puncturing it | Sewing through the coating, which opens a leak path |
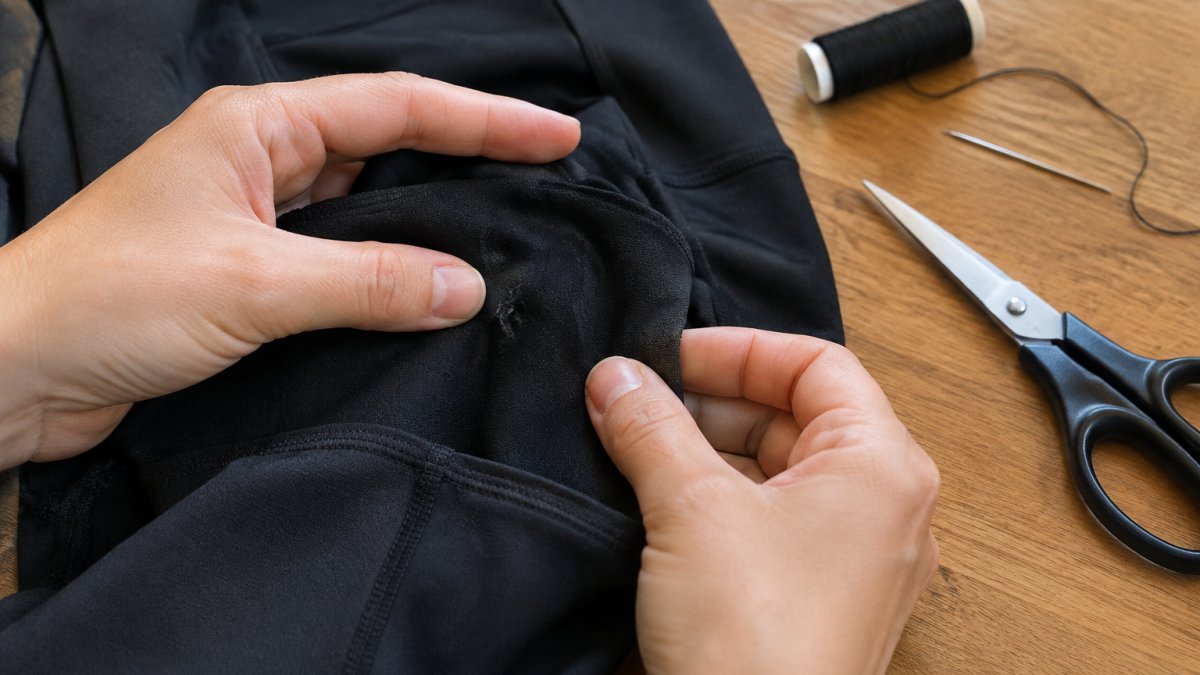
A few fabric-specific rules are worth memorizing. On polyester, keep the iron warm rather than hot and always use a pressing cloth; polyester softens before it melts, so a mark can appear before you smell anything burning. On spandex and elastane, never use a standard straight stitch, because the thread has no give and will tear through the fabric under stretch. On mesh, a heavy patch defeats the purpose of the fabric by blocking airflow, so favor a fine needle and light thread. On waterproof or coated shells, sewing creates needle holes that leak, so heat-activated tape is the safer first choice.
If you are unsure whether a piece is worth saving, learning what makes activewear high quality helps you judge the fabric before you spend time on the mend.
What You'll Need: Tools and Materials for DIY Repair
A small repair kit covers almost every job. You do not need a sewing machine to fix most athletic wear. Gather these basics before you start:
- Hand-sewing needles in a few sizes, including a fine needle for mesh
- Polyester thread that matches the garment color
- Elastic thread for stretchy seams
- Small scissors and a seam ripper
- Iron-on patches or fabric adhesive for quick fixes
- Pins and a thimble
The Best Needle and Thread for Stretchy Fabric
The best needle and thread for stretchy fabric is a ball-point needle paired with polyester or elastic thread. A ball-point needle pushes between the fibers instead of cutting them. Standard thread snaps when the fabric stretches, so pick a thread with some give. Keep your stitches loose and slightly elastic.
How to Repair a Snag in Athletic Clothing
A snag is a pulled thread, not a hole. Fix it before it grows. Here is the simple process:
- Do not cut the loose thread.
- Turn the garment inside out.
- Use a blunt needle to push the pulled loop back through to the inside.
- Gently stretch the fabric around the snag to reset the weave.
- Tie off any remaining loop on the inside with a small knot.
Most snags take under two minutes. Cutting the thread is the common mistake, because it leaves a hole where the snag used to be.
How to Repair a Hole in Leggings
Knowing how to repair a hole in leggings saves a pair you would otherwise toss. Small holes in stretch fabric respond well to a stretch-friendly patch. Follow these steps:
- Trim any frayed edges flat with small scissors.
- Cut an iron-on patch slightly larger than the hole.
- Place it on the inside of the leg, adhesive facing out.
- Press with a warm iron for a few seconds. Check your fabric tag for heat limits.
- For a stronger hold, hand-sew around the patch edge with a stretch stitch.
Watch out: too much iron heat can melt spandex and leave a shiny mark. Keep the iron warm, not hot, and use a pressing cloth.
How to Fix a Seam in Activewear
A split seam is one of the easiest repairs. Turn the item inside out and line up the two edges. Use a backstitch or a small whip stitch with polyester thread. Keep the stitches tight but not so tight that the seam puckers.
If the seam sits in a high-stretch zone, swap in elastic thread. Test the seam by gently pulling it before you wear the piece. A good seam should stretch with the fabric and return to shape.
Repairing High-Stress Areas and Reattaching Lettering
High-stress areas take the most abuse. Think underarms, inner thighs, knees, cuffs, waistbands and the crotch of shorts. These are the spots where seams fail first because the fabric is pulled in two directions at once, and a repair that ignores that tension will fail again within a few wears.
Reinforcing Seams, Knees, Elbows and Cuffs
The goal in a high-stress zone is to add strength without adding bulk or killing stretch. A double row of stitching along an existing seam spreads the load across two lines of thread instead of one. A small patch on the inside of a knee or elbow backs up worn fabric before it becomes a hole. On cuffs and waistbands, which stretch every time you dress, use elastic thread so the repair moves with the garment.
A common pattern is to reinforce the inside of the garment first, then check the outside for puckering. If the fabric bunches, the stitches are too tight. Loose, slightly elastic stitches generally hold up better than tight ones in stretch zones.
Watch out: reinforcing a high-stress area with a rigid patch or non-stretch thread can transfer stress to the surrounding fabric and cause a new tear just outside the repair. Match the repair's give to the garment's give.
Reattaching Loose Lettering, Numbers and Crests
Loose lettering, numbers or crests need a different touch. Heat-transfer lettering is bonded with an adhesive that softens with heat, so the fix is controlled heat rather than a needle. Cover the lettering with a pressing cloth and press with a warm iron for a few seconds, then let it cool fully before you move the garment. For edges that keep lifting, add a few hand stitches with matching thread along the peeling edge.
Watch out: too much heat can melt the adhesive entirely, smear the lettering or scorch the fabric underneath. Test on an inside hem first, and never press directly on the lettering without a cloth.
When to Stop and Seek Professional Repair
Some high-stress failures are beyond a home fix. If the fabric around a seam is thin and see-through across a wide area, or if a waterproof shell has delaminated, a patch will not restore the original performance. In those cases a professional repair or replacement is the better call. If you deal with high-stress strain often, compression gear for recovery can ease the load on those areas.
Care Instructions After Repair and When to Replace Gear
A repair lasts longer when you care for it right. Wash repaired gear inside out in cold water. Skip the dryer heat, which weakens thread and adhesive. Air dry flat when you can.
- Wash cold, inside out
- Avoid fabric softener on technical fabric
- Air dry to protect patches and seams
- Check the repair after each wash
For full washing steps, see how to wash performance gear. When a piece has thin, worn fabric across a large area, replacement beats repair. If you are weighing that call, durable gym clothes built to last and gear choices that prevent injuries can guide your next pick.
Keep Your Gear in the Game with Burrow Athletic
Repairing your gear is an act of resilience, and it fits the mindset behind everything we make at Burrow Athletic. When a piece is truly done, our GOAT headwear is built for game day and everyday wear, and every purchase supports The Be Good Foundation. Shop the GOAT collection and keep showing up with purpose.
Frequently Asked Questions
Can you sew stretchy athletic fabric without a serger?
Yes. A basic sewing machine with a zigzag or stretch stitch works well, and hand-sewing is fine for small fixes. Use a ballpoint needle and polyester thread, and avoid straight stitches that snap when the fabric stretches. For seams, a zigzag stitch mimics a serger's flexibility. If you are hand-sewing, a backstitch with a little slack in the thread lets the repair move with the fabric.
Can iron-on patches be used on spandex or polyester athletic wear?
They can, but with caution. High heat can melt or scorch synthetic fabrics like spandex and polyester. Use a low heat setting and a pressing cloth between the iron and the patch, and test on an inside seam first. Iron-on patches work best on stable areas, not high-stretch zones like knees or waistbands, where they may peel or restrict movement.
When should damaged activewear be repaired instead of replaced?
Repair when the damage is isolated: a single snag, a small hole, a loose seam, or peeling lettering. These fixes are quick and extend the life of the garment. Replace the item when the fabric is thin across large areas, when multiple seams are failing at once, or when the repair would sit in a high-stress zone and likely fail again.
How do you stop a snag in performance fabric from getting worse?
Do not cut the pulled thread. Instead, use a blunt needle or your fingers to work the snag back to the inside of the fabric. If a loop remains, tie it off gently on the inside with a small knot. A tiny dot of fabric adhesive can secure the spot. Washing the garment inside out in a mesh bag also prevents further snags during laundry cycles.
Your gear works hard, and a few minutes with a needle keeps it working longer. When it is time for something new, Burrow Athletic offers performance-driven headwear rooted in character and community. Explore the GOAT line, wear it with purpose, and support The Be Good Foundation with every order.
